Monday, October 27, 2014

A Simple Card

Hello everyone!!

I just wanted to do a quick share with you today of the card I made for Nani ke Ola. I again used the Prima Epiphany Collection. 


I made the card to match the shadow box I did last Friday also for Nani ke Ola. I really love how both things especially this card turned out.

Here is a close-up of the embellishments on the front....


I used the flowers from the collection, as well as the wood icons, and 3D stickers. I also used some flowers and lace from my stash. 

I hope you like it :)

Here is my video that is over on my YouTube channel if you would like to check it out.....


Thanks for stopping by and make sure to check out the Nani ke Ola Blog for a list of products used!

I hope you have a great day!!


Friday, October 24, 2014

Daydreaming......

Hello everyone!!

Oh my gosh! It has been forever since I posted on my blog....ok I know I am a slacker! lol Well since I last posted I moved..which is always a pain! So besides crafting I have had to totally uproot my life and move it to another house, but I promise I will show you what projects I have done over the last month and a half...WoW! I can't believe it's been that long!

Anyways, I wanted to share with you guys today a shadow box that I came up with using a lid from a wooden box that I used for a candy drawer awhile ago. I saved the lid knowing I wanted to do something like this someday and the Prima Epiphany collection was the perfect papers just for this. 

I love how it turned out!


Did I mention that this is a Design Team Project for Nani ke Ola? You need to go check out all the new goodies she has in her store....the Prima Epiphany Collection is one of them. GORGEOUS!!! I am seriously hoarding all of this paper I can get my hands on...lol!!

I got the idea for the layout type thing on the inside of the shadow box from the Prima BAP October Challenge. When I say the sketch for this month I knew it would be just perfect for this project. Let me show you the sketch....


You can just click on the sketch and it will take you over to the challenge information. 

I have never entered a challenge for Prima so wish me luck!

So I hope you can see a slight resemblance between the sketch and my shadow box. I actually had fun making this and using the new Epiphany Papers....have I mentioned they are Gorgeous? 

Here are a few close-ups....


I used a Prima Butterfly stencil you can get over at the Nani ke Ola store with some homemade modeling paste. I then used some Lindy's Tilt-a-Wheel Teal, and Wake Me Up Before You Go Gold, and I also used some of the new Prima Color Bloom Spray in Pastel Sunshine. The script stamp is from the Epiphany Collection and you can get that at the store as well. I used some Epiphany Ephemera pieces and Wooden Icons to dress it up. Along with a couple of flowers and lace from my stash. I love how it turned out and I hope you do too! 

Here is the view of the papers I used on the side and the back as well...


For all the information on the details please watch my video that is over on my YouTube channel and also posted below....


Here is the links to Nani ke Ola's store as well as the blog with a list of all the products I used:


Thanks for stopping by!! I love reading comments and answering questions :)


Wednesday, September 3, 2014

'Never Give Up' Mixed Media Canvas

Hello everyone!!

I want to share with you today a mixed media canvas I did for a design team project for Nani ke Ola. If you are coming here from their blog then you probably already know that I used some Domestic Goddess papers, UmWowStudio chippies and also some yummy Lindy's Stamp Gang sprays :) I finally got my hands messy again and I have to tell ya....I really enjoyed every minute of making this canvas. So relaxing to paint and watch something come to life!


Here is the full overview of the canvas...I just love the colors and how it turned out!!


Here is a close-up of some of the corners....I used some junkyard findings and embellies from my stash. As well as some chippies from UmWowStudio. The set I used from Lindy's Stamp Gang is called Under the Boardwalk. You can find all these products at Nani ke Ola. Oooooo and I just checked and she just got in some new Prima Products....OMG!! ok so on with my post....


Here is a close-up of the letters...I really tried to make them pop out..I think they turned out pretty good considering it's my first time doing something like that..lol! I also used a couple techniques I learned watching Marta which is a GDT for Lindy's Stamp Gang...the lid with the paint to make the circles...love it!!

Here is another full overview of the canvas...


I also have a start to finish video over on Nani ke Ola's YouTube channel :) Make sure to subscribe so you will receive the latest product reviews and tutorials from the Nani ke Ola's Team!! 


For a list of products used please visit Nani ke Ola's Blog.


Thanks for stopping by and I always love reading comments!!


Monday, September 1, 2014

Creative Blog Hop

Hello everyone!!

As you may know my name is Becky. I am a stay-at-home mom and also a crafter! I was invited by Laurie Moore from Moore Art From the Heart to do this creative blog hop. This hop is about sharing a little bit about myself and some other inspiring friends as well.

I met Laurie first through YouTube by watching her videos on her layouts, which I absolutely admire. I still don't think my layouts are up to par...lol. Anyhow, I then became friends with her through facebook and I found she had an ArtFire store and had ordered some stuff from her. She came out with these mixed media/Steampunk style tins that I absolutely LOVE! I absolutely love her style and I think she is kinda like me versatile with her style and I thinks she can do absolutely any style and pull it off! :) I have also recently been helping her with her group on Facebook that is an Unused Items Challenge every month that is a lot of fun.

Please visit her blog by clicking on the Moore Art From the Heart above to see what amazing things she is doing now.

Do you want to know what I am working on now? 

Well here is a picture....


I am working on a Mixed media Canvas for a design team project for Nani ke Ola. I am some 7 Dots Studio paper under all that stuff. There will also be a start-to-finish tutorial on this when I am done. I know my table is a mess....good thing I didn't take a picture of all of it...It always is especially when I do mixed media. 

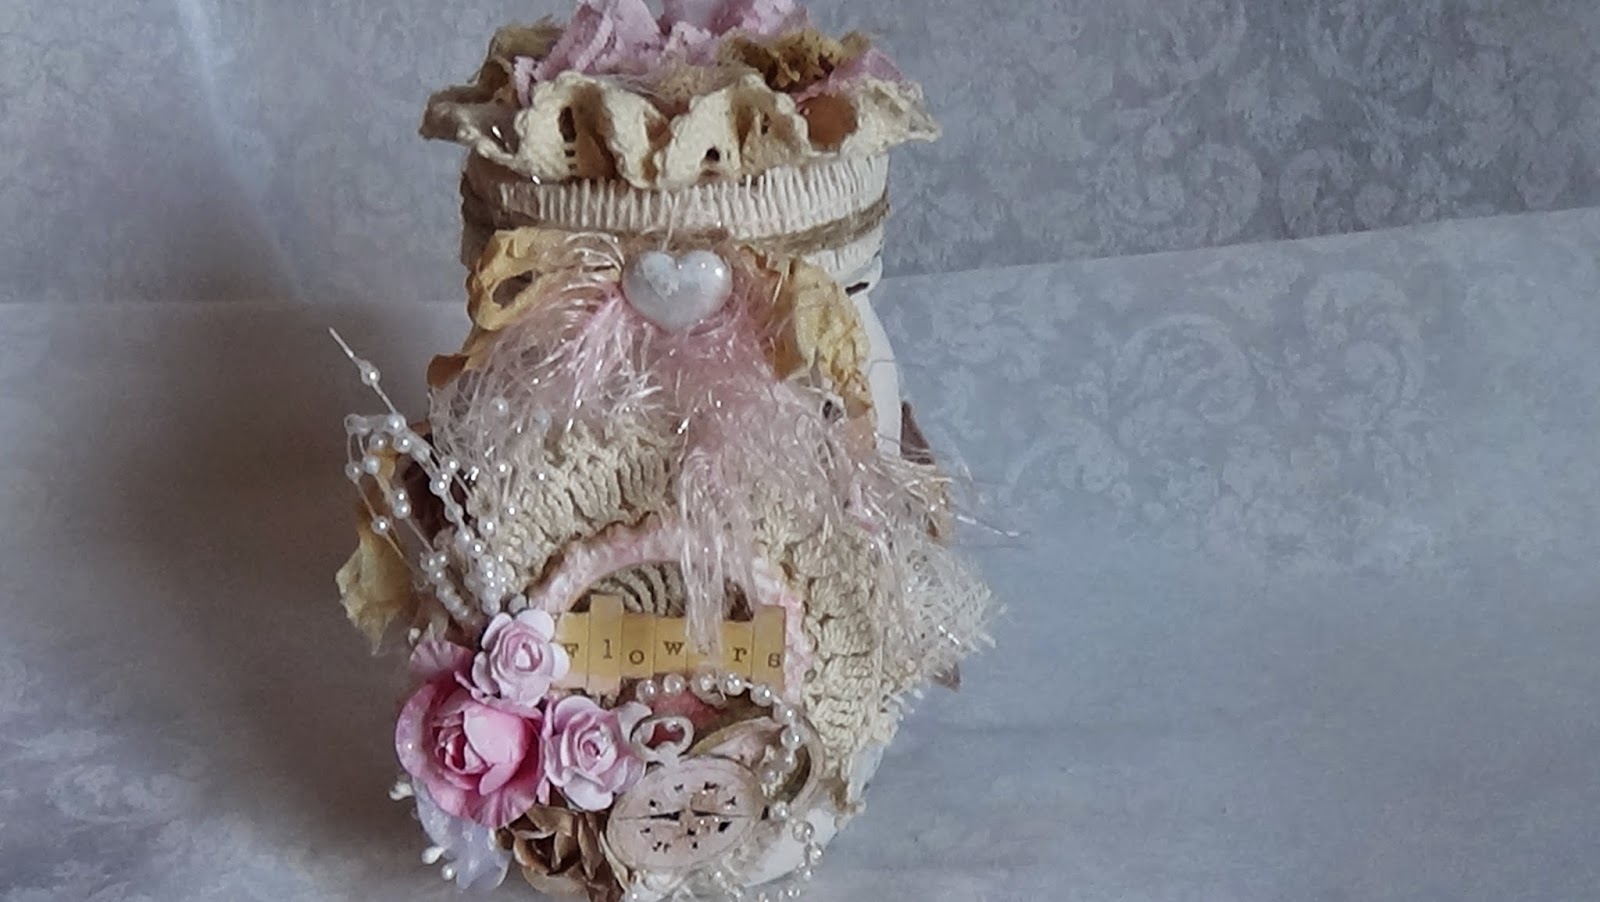
Here is a picture of the previous project I just finished...


Some shabby chic puffy hearts....it's a wall hanging I did for someone...can't say who just yet :) As you can see I go from one extreme to the next...I love all styles and will try anything at least once! I love all styles but I am really starting to think that my two absolute favorite is shabby chic and mixed media because that is what attracts me the most. The luscious laces and softness of shabby chic and the colors and textures of mixed media.

How does my style differ from others?

I don't really know how to answer this because as I am learning and growing with my crafting... I do try a lot of things that people do and follow along with tutorials until I get it and make the techniques my own. Even though I may replicate what someone has already made you can definitely tell that is was me that made it. I don't know if it is the special touches that I do to the projects or what but I think that no matter what you will never be able to totally replicate the project because you are your own person and do things your own way.

Why do I create what I do?

I love to craft it is my passion. When my kids are away at school I love to sneak off to my room. It is very relaxing and I love to see the end product. I also love to watch my views go up on YouTube and helping people that are just starting to craft. It kinda gives me that warm fuzzy feeling inside. :)

Where do I get my inspiration?

I get it from Pinterest....love that site!! Also Facebook and YouTube are my definite go to's. I don't really have one specific person that gives me inspiration because there are a lot of people out there that I get ideas from and absolutely love their work! I also love to just sit down with just an idea and build on it and see where it takes me...I love to do this because it forces me to relax and let the creative juices flow.

Like with this project for example....


 I would like to also introduce a couple of friends and their blogs. These people are who I find inspiring. Their posts will begin on the 8th of September 2014. 

Jennifer Mileli Blog titled: Nani ke Ola
http://nanikeola.blogspot.com/

Jenn is the owner of Nani ke Ola in which I am also a design team member for. She has some amazing products in her store like 7 dots studio, Prima and Lindy's Stamp Gang. She also does some amazing layouts I especially love her Color Run layout. I am always facinated by layout because I am not sure I can really do them cause I want to add everything and then it's too dimensional...lol! Her style to me seems simple and clean, she also love to play in a little bit of color with the Lindy's Stamp Gang and I absolutely love it!

Bobbi Ann Cook Blog Titled: The Bead Goes On
http://bobbianncook.blogspot.com/

I just barely met Bobbi through Facebook and I absolutely love her tags and cards she has on YouTube. She a Parisian theme tag that is black and pink that is so shabby and cute!! You should go check out her YouTube channel: https://www.youtube.com/channel/UCJyzd95wb62m_NuuxGfhKxw She is a very sweet person and has left a lot of sweet comments on my Facebook page. She has also done some Guest Designer spots for a couple of companies. She also love to decorate her house as I was talking to her today she was pulling out all her fall stuff. She is a very sweet and talented person!! 

Thank you so much for stopping by and I enjoy reading your comments! 


Saturday, August 30, 2014

Shabby Hearts

Hello everyone!

I am sharing with you all today my shabby hearts another DT Project for Craftsupplies1! :) I love how these turned out....even though it felt like I didn't know what I was doing...lol!


Here is a picture of them hanging together....I used some fabric that I have had in my stash forever and cut some hearts out and sewed and stuffed them. I used some Craftsupplies1 goodies such as the laces and trims, appliques, flowers, charms, and bead caps. I made them to kinda tear down from one another and I think it turned out cute!


Here is a picture of them separated....I also used some tickets from Tim Holtz and made them into little tags with fabric sewed behind them. 


Here is the first one on the top...I used them same fabric on the front and back and here you can see the trim and lace that I used and also a flower applique and stickpin I made using the flower bead caps from Craftsupplies1.


Here is the purple one I made it is the second one down...not the greatest pic but I was trying to take it while it was hanging...I used a doily on this one and stuck it behind the wood word LOVE, and there is also a ribbon and porcelain rose and some organza and pearl trim from Craftsupplies1 as well.


Here is the third one I made and it's the bottom heart of the hanging. There is a charm, lace that isn't pictured very well here, and also a flower applique and a paper flower from Craftsupplies1.


And here is the last one that I made it kinda hangs to the left and bottom of the top heart. I did all the flowers in a different color scheme. So obviously this one is a light peach, I also added a little bit of brown to it with some flowers and the tag. The flowers and trims you see are from Craftsupplies1. The wood words and shapes are from Prima...my fav! 

As always here are the links to the stores and there is also a BOGO sale on the Parchment Paper Flowers still going on:

There is also a GDT position coming open...check out my video below for more info:

Here you will find all the details on the shabby hearts!!


Thanks for taking the time to stop by!!! Comments and questions are always appreciated!!


Wednesday, August 20, 2014

Shabby Altered Mason Jars

Hello everyone!!

I am so excited to share with you my altered mason jars. I absolutely love how shabby they turned out!! They are a design team project for Craftsupplies1 so I used a ton of goodies from Julie's store. 

Here is a picture with both of the mason jars together...


So shabby cute!!  


Let me start with this one...I first started with some white spray paint then I used some of my acrylic paint in white and parchment and mixed them together with some sand to give them some texture. Then I took my Spun Sugar distress paint and lightly when over it to give it a pink hue...then I took a sanding pad and distressed it in areas..love how it turned out :) I also wrapped this one in some wide lace from Craftsupplies1 and then with a Recollections trim.


Here is the front with the flower cluster...I toke a square of muslin and added cheese cloth and a doily from Craftsupplies1 and glued it down then added my frame and alphas and tiny wood clock from Prima. I then added all the flowers you see from Craftsupplies1. The top of the jar is wrapped in more muslin and jute twine. Then on the very top I added a handmade flower using lace and trims from Craftsupplies1 as well. (Pictured Below)


Here is the other one.....

I did all the same things as I did on the first one....I wrapped in the wide lace but this time I also used Jute twine. 


Here is the picture of the front on this one....I used a square of Muslin again and cheesecloth and a doily. Then I used another one of my resin frames from the Martha Stewart mold and some alphas I have had forever. This flower cluster I also included a handmade flower I got from one of my friends Becky Long. It's pretty much the same idea as the first one. 


And here is the picture of the top of the jar with my handmade flower. I love how these turned out!!

Craftsupplies1 is also having a BOGO sale on Parchment Paper flowers. When you buy one you get one free Julie automatically includes it in your order...no coupon code needed. 

Click on the link below to visit her shops:

Also check out my video over on my YouTube channel where I explain all the details and you can get and up-close view of the jars :)


Thank you so much for taking the time to stop by!! Comments and questions are much appreciated and always welcome!!

Friday, August 15, 2014

My First Design Team Project for Nani ke Ola

Hello everyone!

I just wanted to do a quick share of the projects I made for Nani ke Ola's design team. :) I think they turned out GREAT! I was a little nervous because it was my first projects but hopefully that will settle down and my work will be able to shine through...lol!


Here is my altered paintbrush featuring the Domestic Goddess papers by 7 Dots Studio. I am calling it "Bold and Beautiful". I did an image transfer with the paper on the handle of the brush...I think it turned out pretty cool!! I also have a start to finish video on this brush over on my YouTube channel:


Last but not least......hehe!


Here is a little box that I also made using the same paper line. I am calling it "Always Creative" I really like this one and how it turned out!! 

I also have a video on this describing all the details on my YouTube channel:


If you want to know more details head on over to the Nani ke Ola blog where you can see more pics and a list of products used.

Also Nani ke Ola has a YouTube channel...yep and you can find my videos there too along with inspiring projects and details on products that are in the store..while your there hit subscribe :)

Thanks for stopping by!! :)


Monday, August 4, 2014

Craftsupplies1 YouTube Hop!! Come Join in the fun :)

Hello everyone!!

I just wanted to share with you today the prizes that I made for the Craftsupplies1 YouTube Hop! If you have never done a YouTube hop before...it's really easy to enter, just watch everyone in the Craftsupplies1 DT video..subscribe and leave a comment on each channel. You would be entered to win each DT members prize and also there are two Grand Prizes of $40 to Craftsupplies1!!!

Ok so here is what I made to give away....


Aren't they just beautiful!! I altered a frame, balsa box, and made a card.  I used a lot of Craftsupplies1 goodies, laces and trims, flowers, doilies, and acrylic sprays.


Here is the frame by itself...it is a Micheals Dollar Frame and I used Prima Lyric on it with some Guava and Gold Gelatos and also some gesso on the paper. I also ran the paper that is around the boarder  of the frame through my embosser which gave it a really cool texture! I also handmade the big flower and sprayed it with my Lindy's. The bow is made out of lace from Craftsupplies1 :)


Here is the altered balsa box I made. I made it into a camera by following a tutorial by Scrapinology on YouTube. They are a lot of fun to make. You can alter them into any style you like and this one I went with Shabby Chic to match my frame. 


And here is my card...using the same paper I altered an envelope that comes with the corrugated cards from Michael's. Again, I used Craftsupplies1 goodies, and decorated the outside of the envelope. I toke a piece of paper from the paper line that look like a frame and stamped Thank You on it and also added a tab from my Tim Holtz die, Tags and Tabs. 

Craftsupplies1 is also having a 25% off everything sale right now while the hop is going on and will end Aug 10th....
Here are the links to both stores:


I hope you like my projects and will come join the fun over on YouTube! 
Here is my video that's on my YouTube channel and it also has all the info for the hop and the details on the projects above...see you there!!


Thanks for stopping by!!! Comments are always appreciated and welcomed!! :)


Thursday, July 31, 2014

Shabby Hot Air Balloon

Hello everyone!!

I just want to share with you guys another hot air balloon that I made for a DT Project for Craftsupplies1. I have made a couple of these pretties before and I even have a tutorial on how I make them...I will post at the end :) So here is a pic of the full view of the balloon....


I tried to shabby it up quite a bit...I think I succeeded and I am getting better at the shabby chic look..yay! Anyways....I used flowers, trims, and of course doilies, and the new flower applique Julie is carrying in her shop...must check them out! Just click on the Craftsupplies1 name.

Here is a pic of the top of the balloon...


Here another pic of the very tippy top..lol....


The flowers..like I mentioned are from Craftsupplies1....the little berries are from my friend Marla Rizzo and the wood embellies are from Prima..yes there is a wood hot air balloon and a clock tucked in there..lol! In the video that will be posted at the end you will be able to see where I tucked in the flower applique. 

Here is the pic of the basket...


Inside the basket is a handmade flower that I made using doilies from the store. I love how this one turned out and I hope the person that it's going to will love it too!


As promised here is my tutorial on how I make my hot air balloons:


And here is my YouTube video with all the details on what I used on the balloon pictured above:


Thanks for stopping by!!! I always love and appreciate comments!! :) 


Friday, July 25, 2014

My Shabby Chic Card

Hello everyone!

Today I am sharing my DT project for Craftsupplies1. I decided to do a Shabby Chic card with a hot-air balloon. If you follow me on YouTube then you know how much I love to make hot-air balloons..lol! I am actually making another hot-air balloon to go with it, I just haven't finished it yet. I used some yummy flowers from Craftsupplies1 and some new appliques that are in Julie's shop, but surprisingly I didn't use any lace....imagine that! 

So are ready for some pics...I really don't have that many today...


Here it is!! A full view pic..lol! I used a corrugated card from Recollections you can get them at Michael's. The paper I used is Prima Delight and I also used the chipboard pieces from the collection as well. I made the hot-air balloon by cutting out a silloute from an online clip-art. I think I cut about 10 of them and then folded them in half and glued them back to back. 

See pic below...


This is somewhat of a close-up of the hot-air ballon. I used some lace from Craftsupplies1 and also a butterfly filligree...so cute!!


Here is a close-up of a couple of the chipboard pieces from the Delight collection. Here you can also see pieces of the applique that I used too. 


Here is a close-up of the flower cluster I did. There is some flower bead caps that I used from Craftsupplies1 and also the beautiful applique that is underneath. 


Here is another close-up of the flowers and the cute little butterfly that Becky Long sent to me. :)


This is a pic of the whole bottom of the card...I really love how it turned out! 


Oh and we can't forget about the inside...This is what I did. I just put some background paper down with this plaque that I stamped with the quote. I also added a flower from the applique and some half-back pearls and some Prima Say it in Crystals. Love the tiny flowers...too cute!!! 


And as always....here is my YouTube video with all the details....


Thanks for stopping by and I always love comments :)